Notification Service Extension
Object-C SDK 2.5.0403 以上版本及Swift SDKThe Notification Service Extension needs to be integrated to support full push functionality.
First, add notification service extension Target
- 1. Open the main project. Xcodeproj or. Xcworkspace
- 2. Click on the menu bar at the top:
File > New > Target...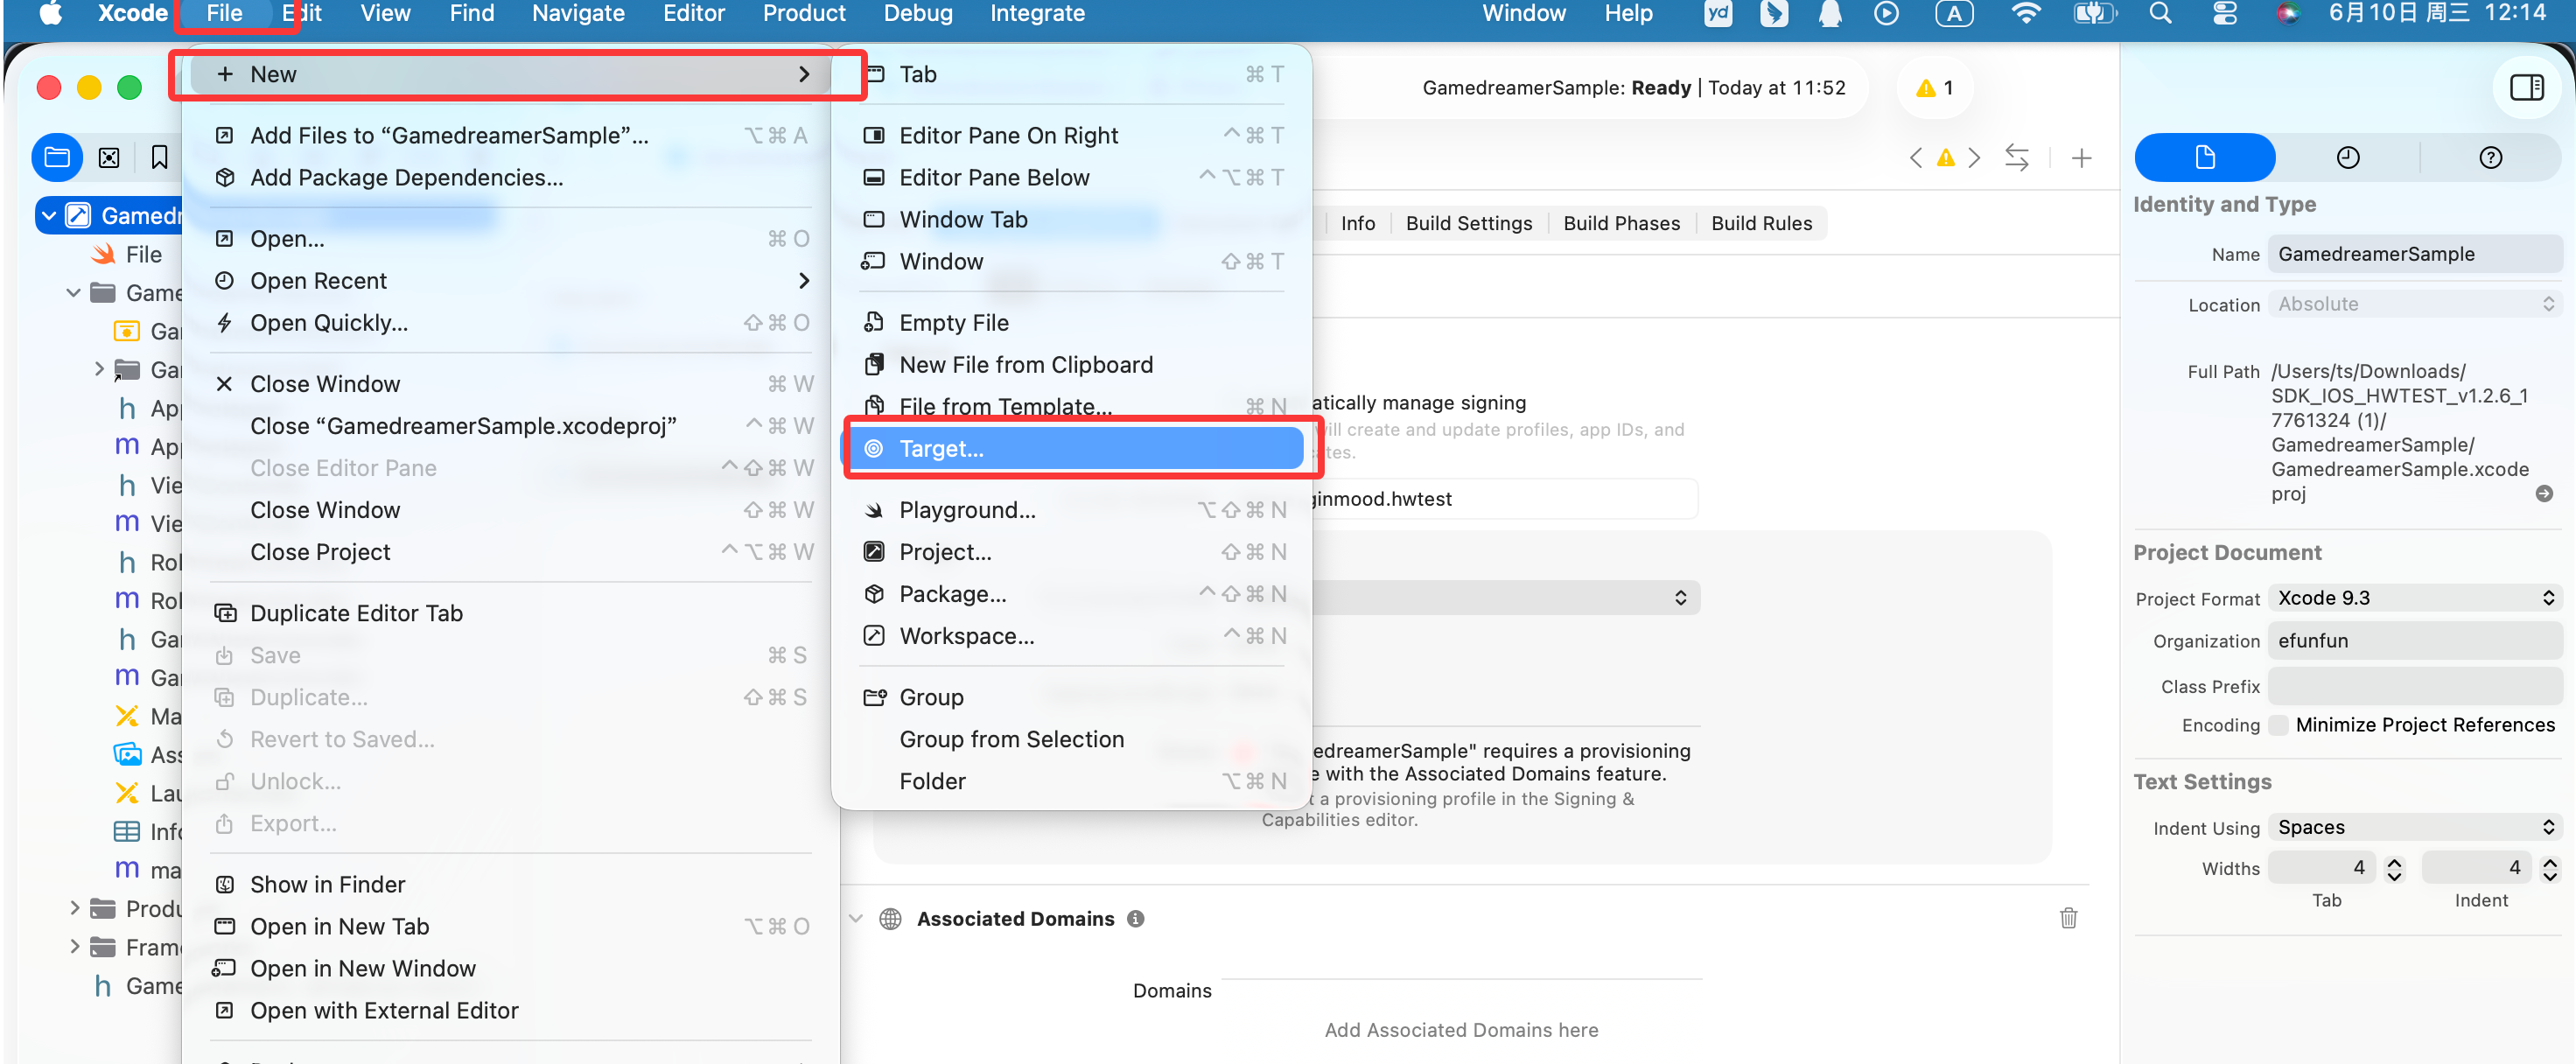
- 3. Select:
Notification Service ExtensionclickNext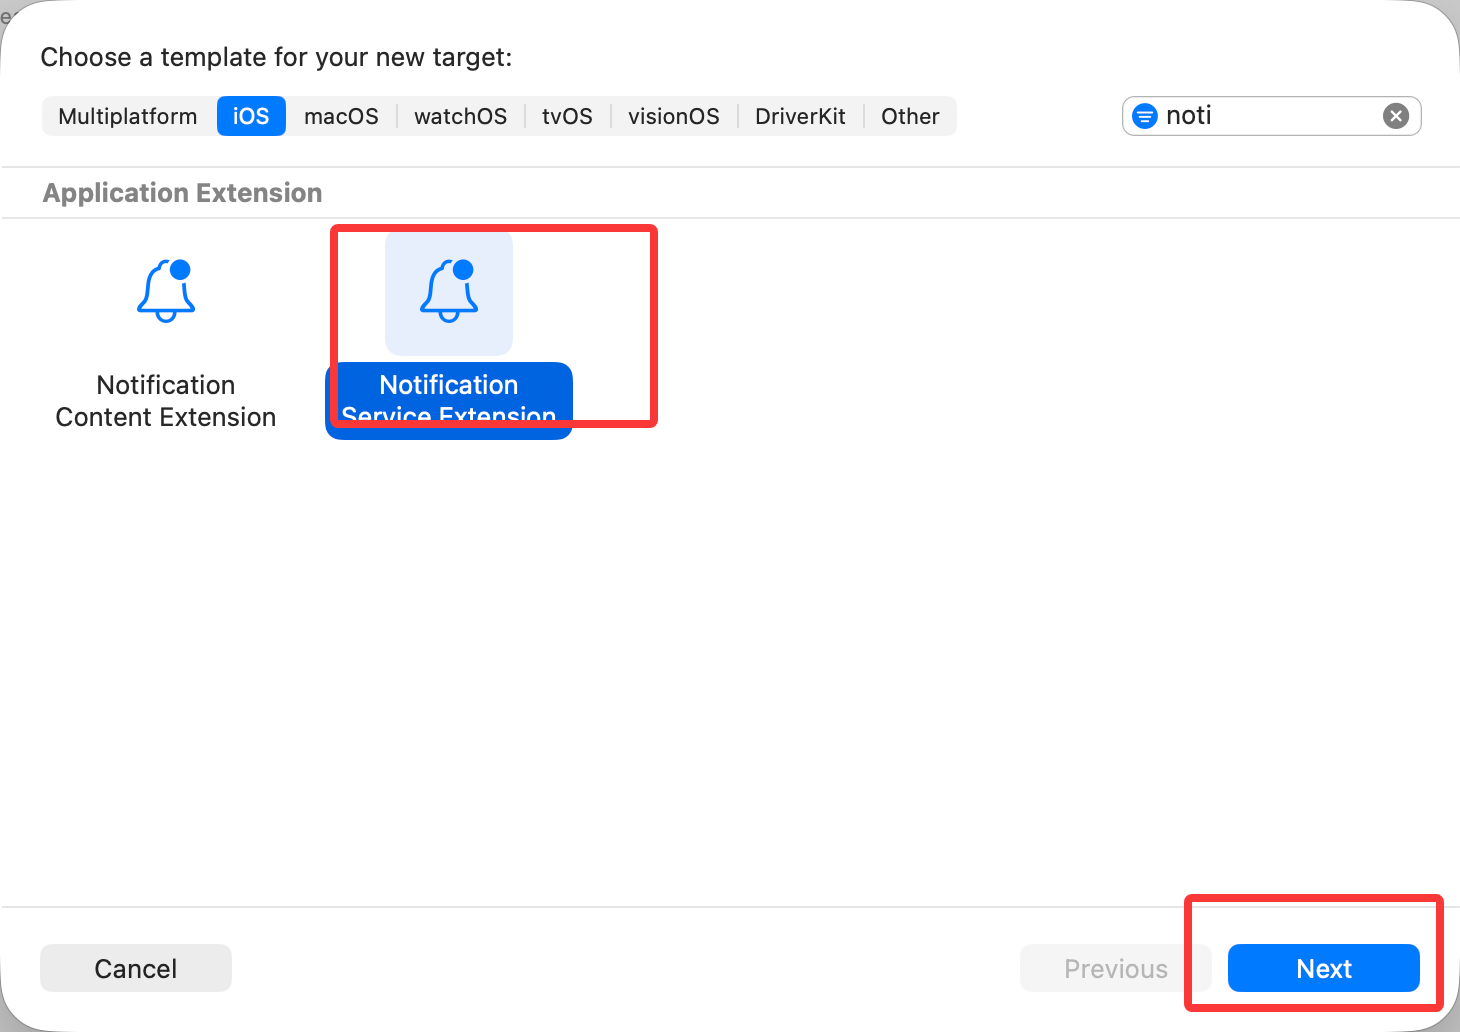
- 4. Naming, for example:
NotificationServiceExtensionclickFinishAnd activate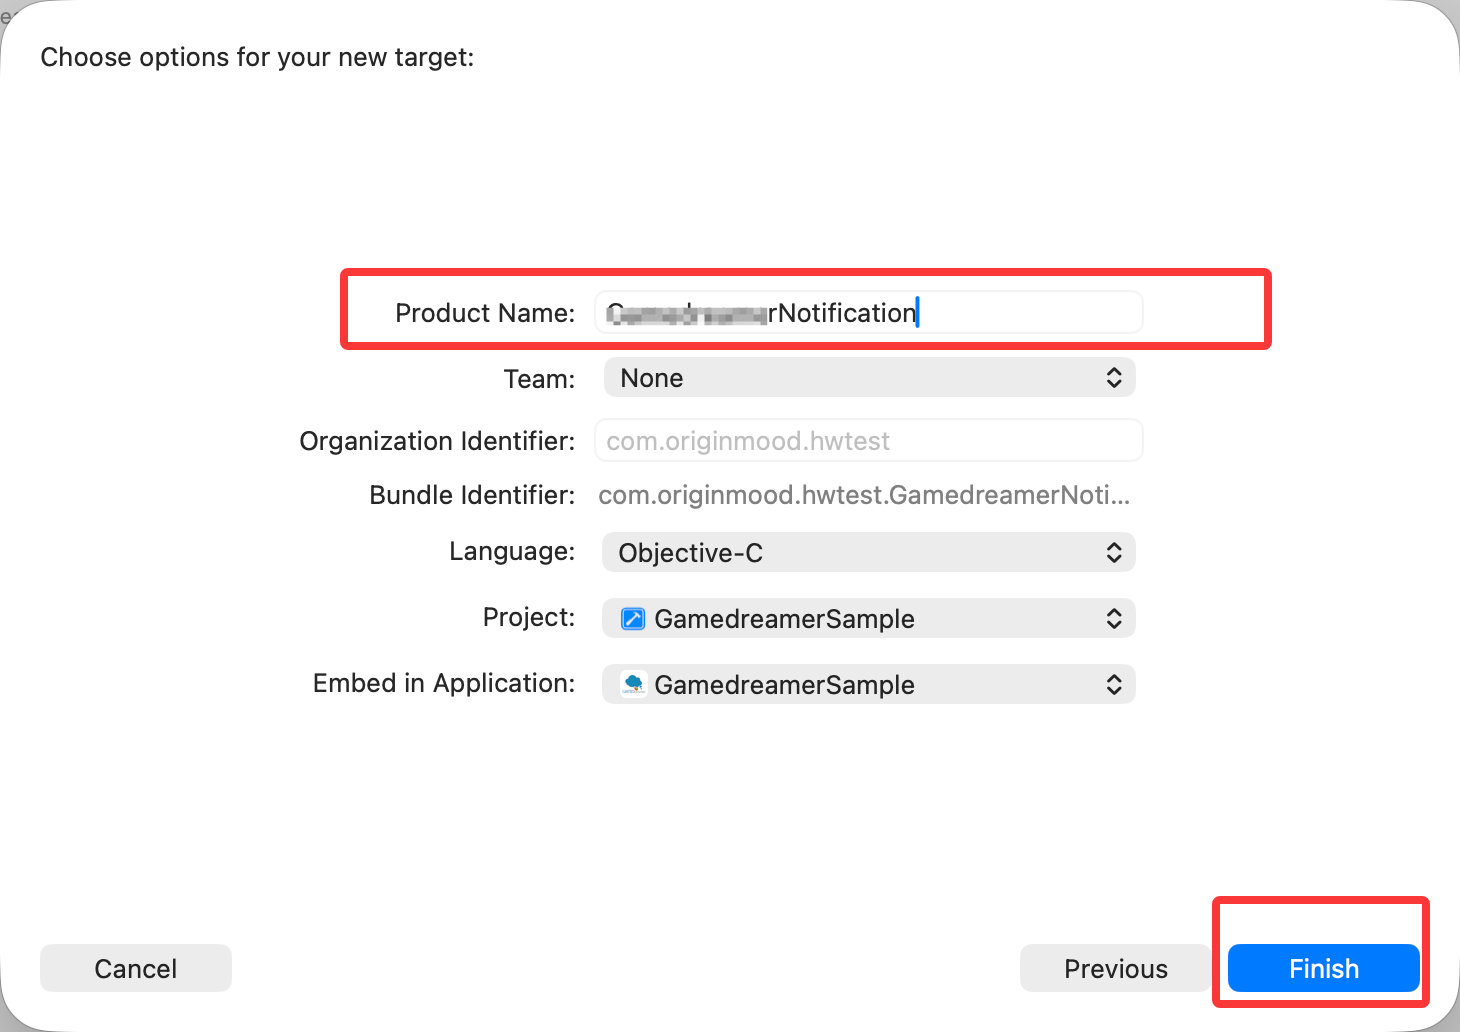
- 5. Xcode will automatically generate extended after creation
Info.plist,NotificationService.h,NotificationService.mFiles andTarget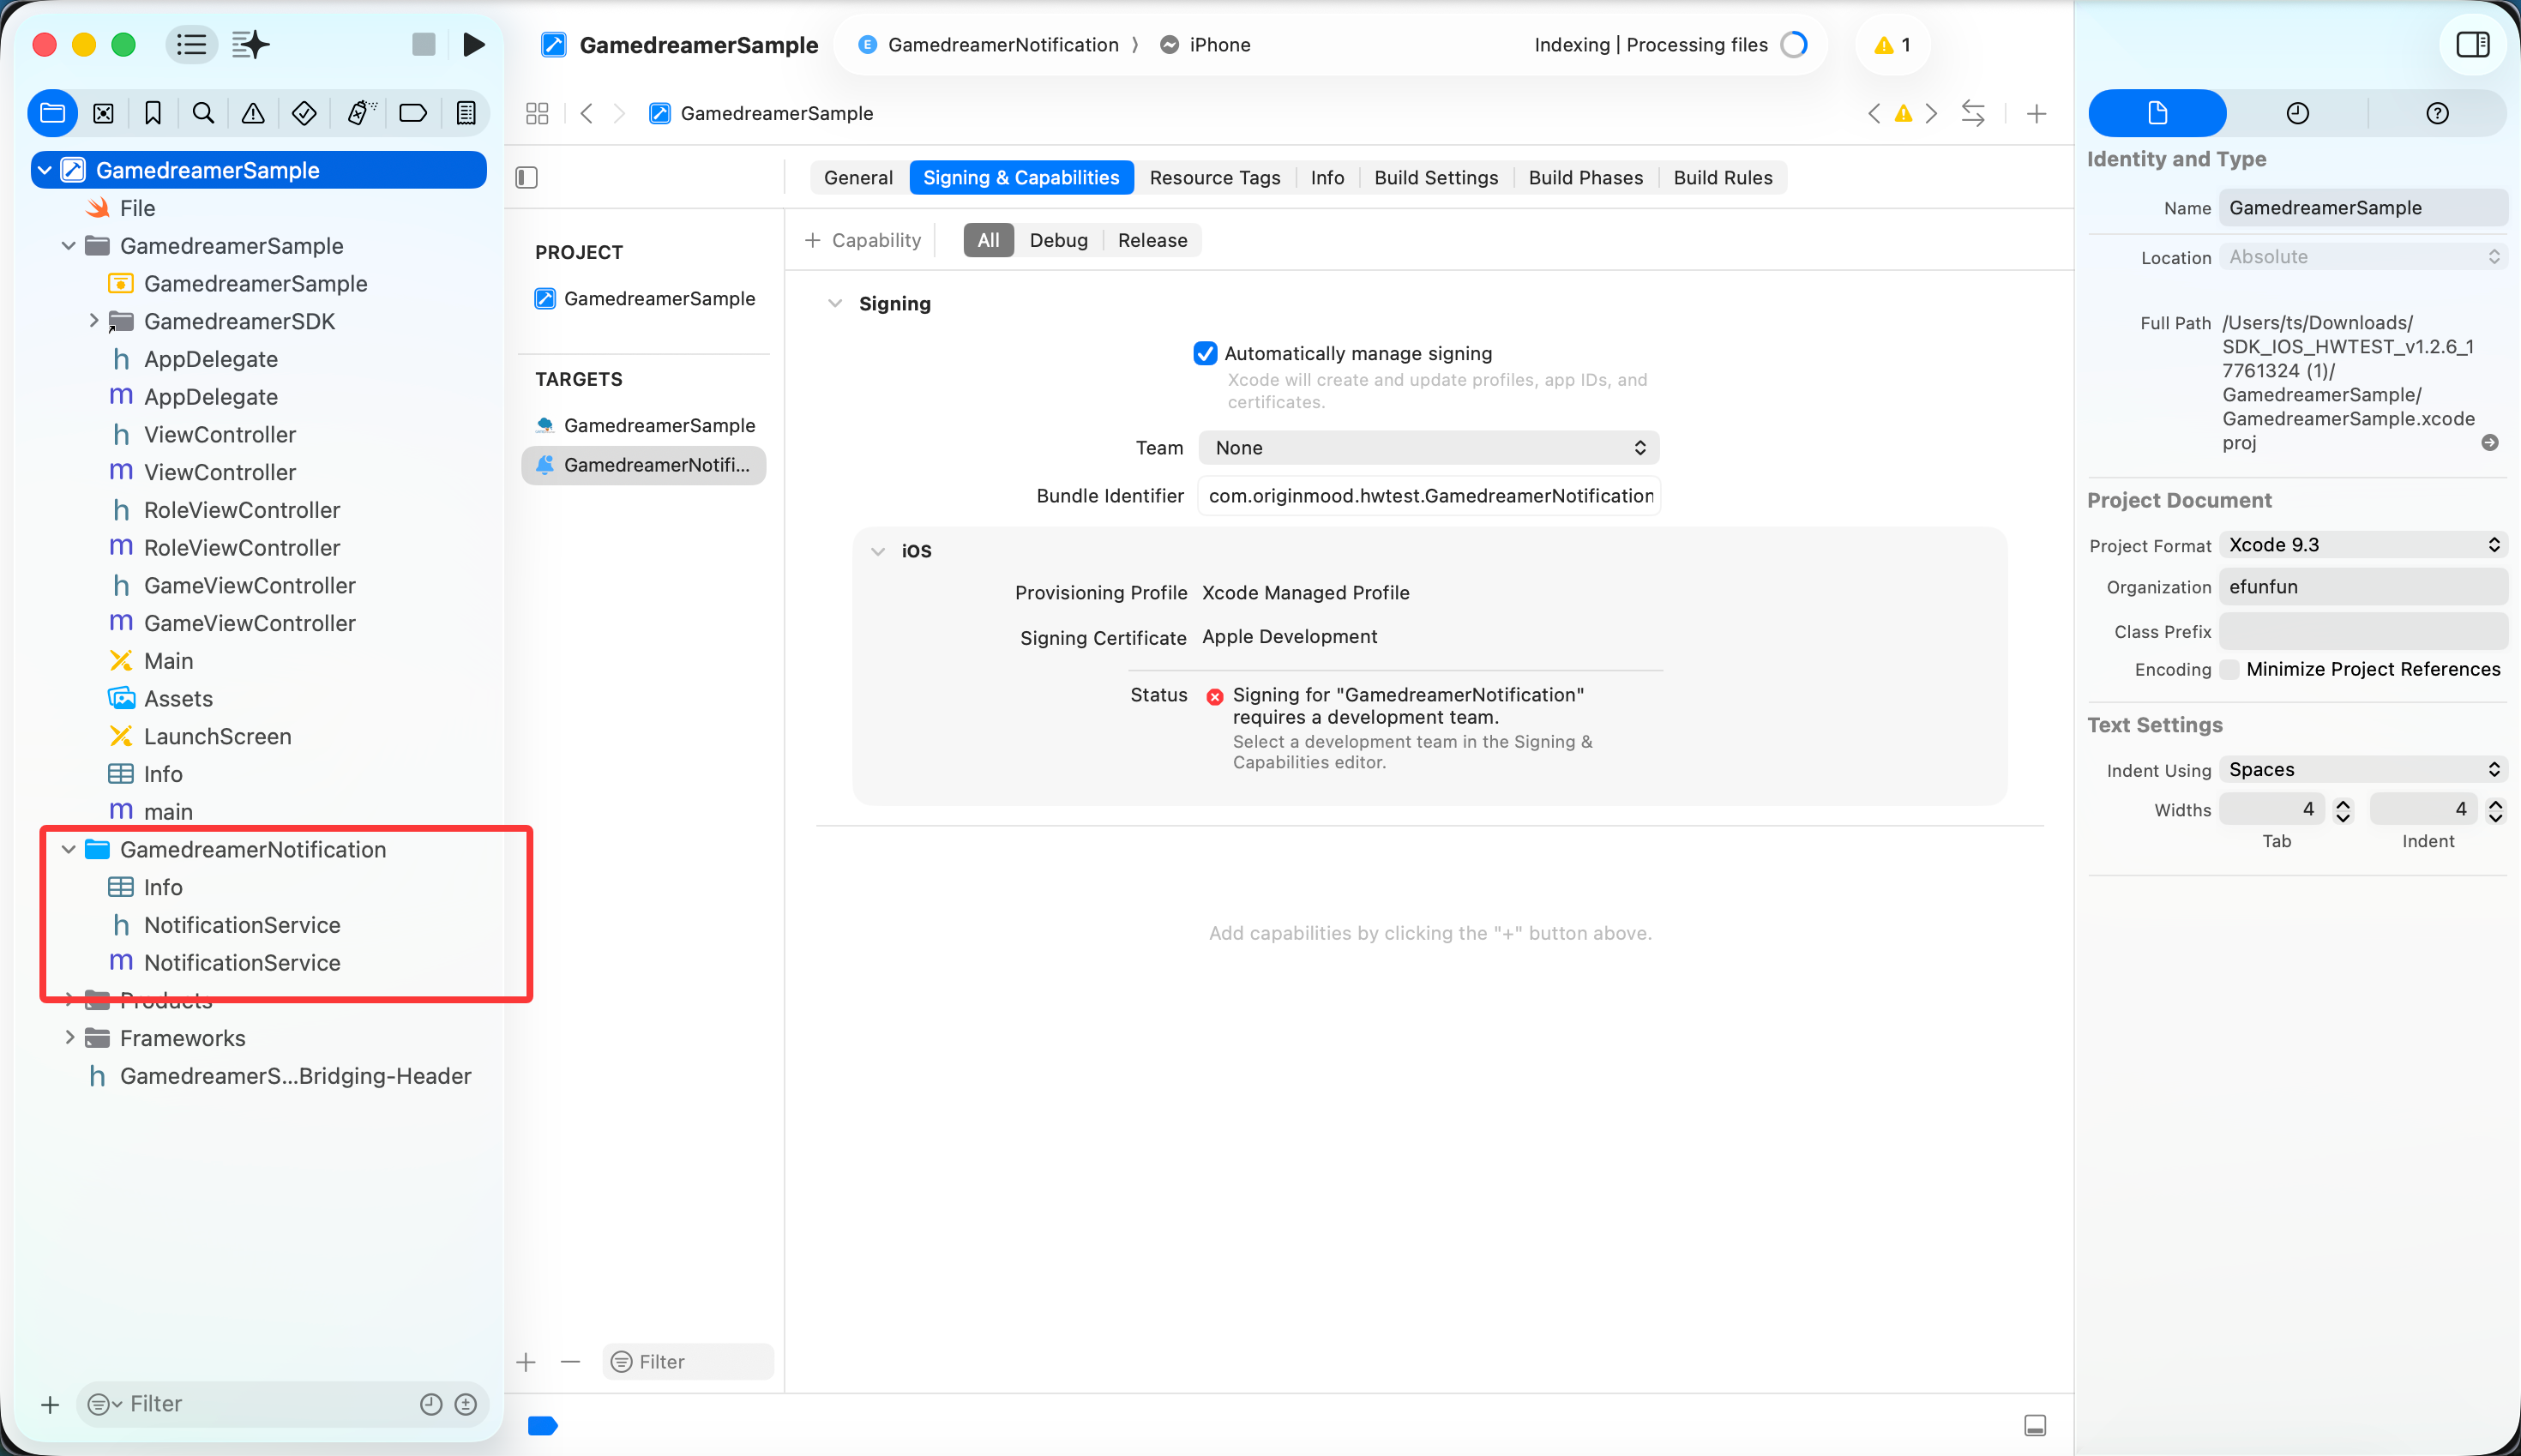
Second, the extended configuration description file (Provisioning Profile)
The main App(com.example.myapp) and the extension (com.example.myapp.Notification) must have separate Provisioning profiles. The extended Bundle Identifier must be prefixed with the Bundle Identifier of the main App,And add a custom suffix after it
Project -> Targets -> NotificationServiceExtension -> Signing & CapabilitiesClick inProvisioning ProfileOption to add a description file. The effect is shown in the figure: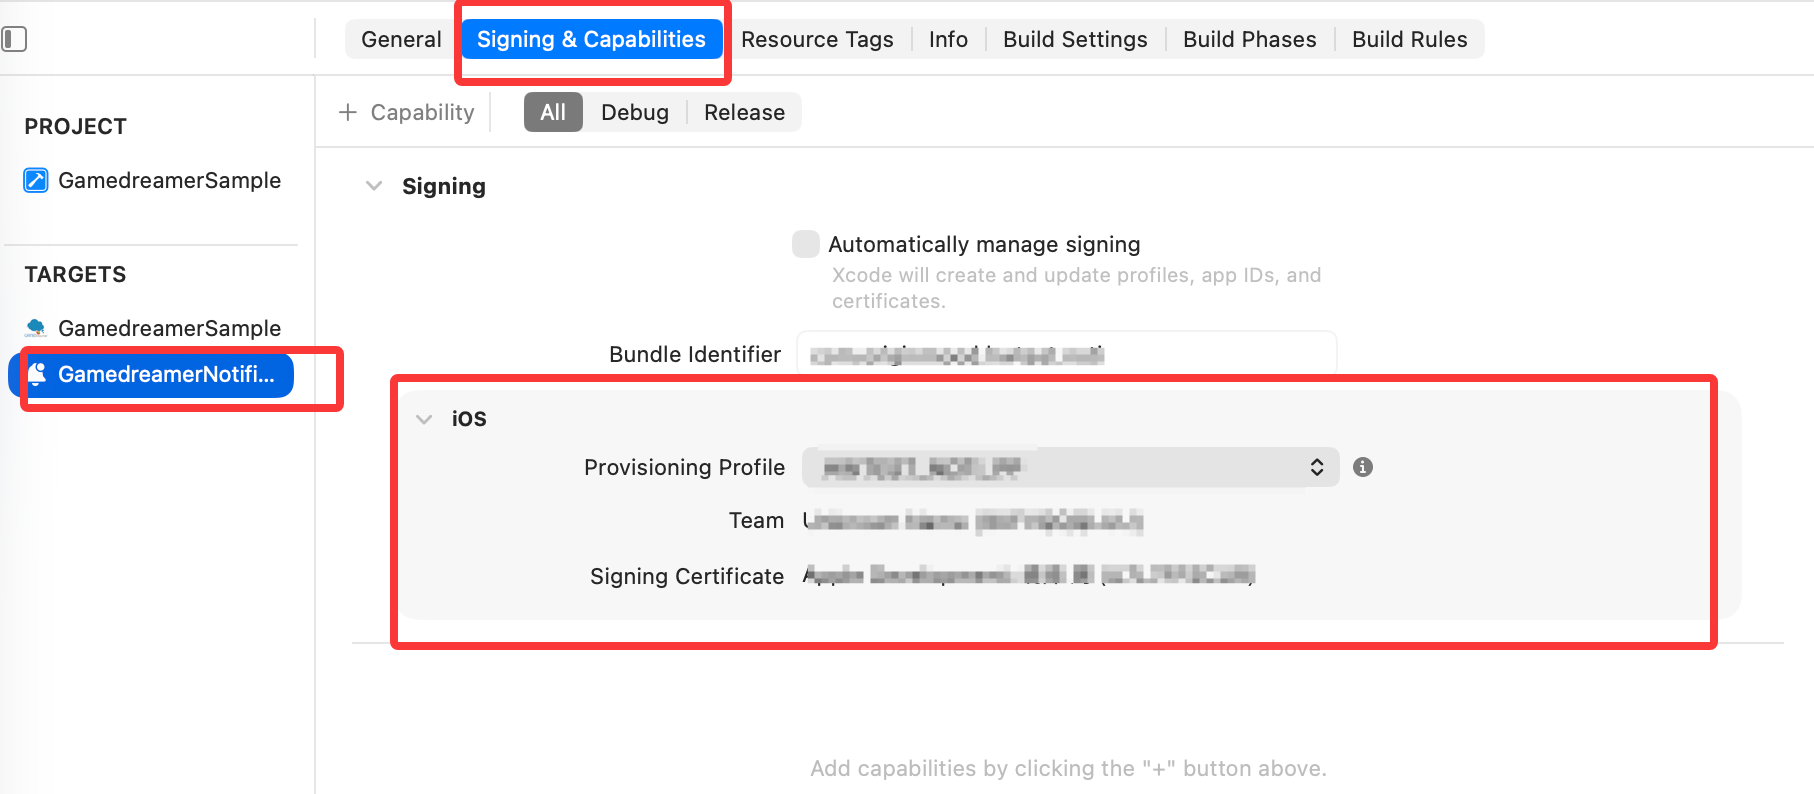
III. Version Management of Main App and Extension
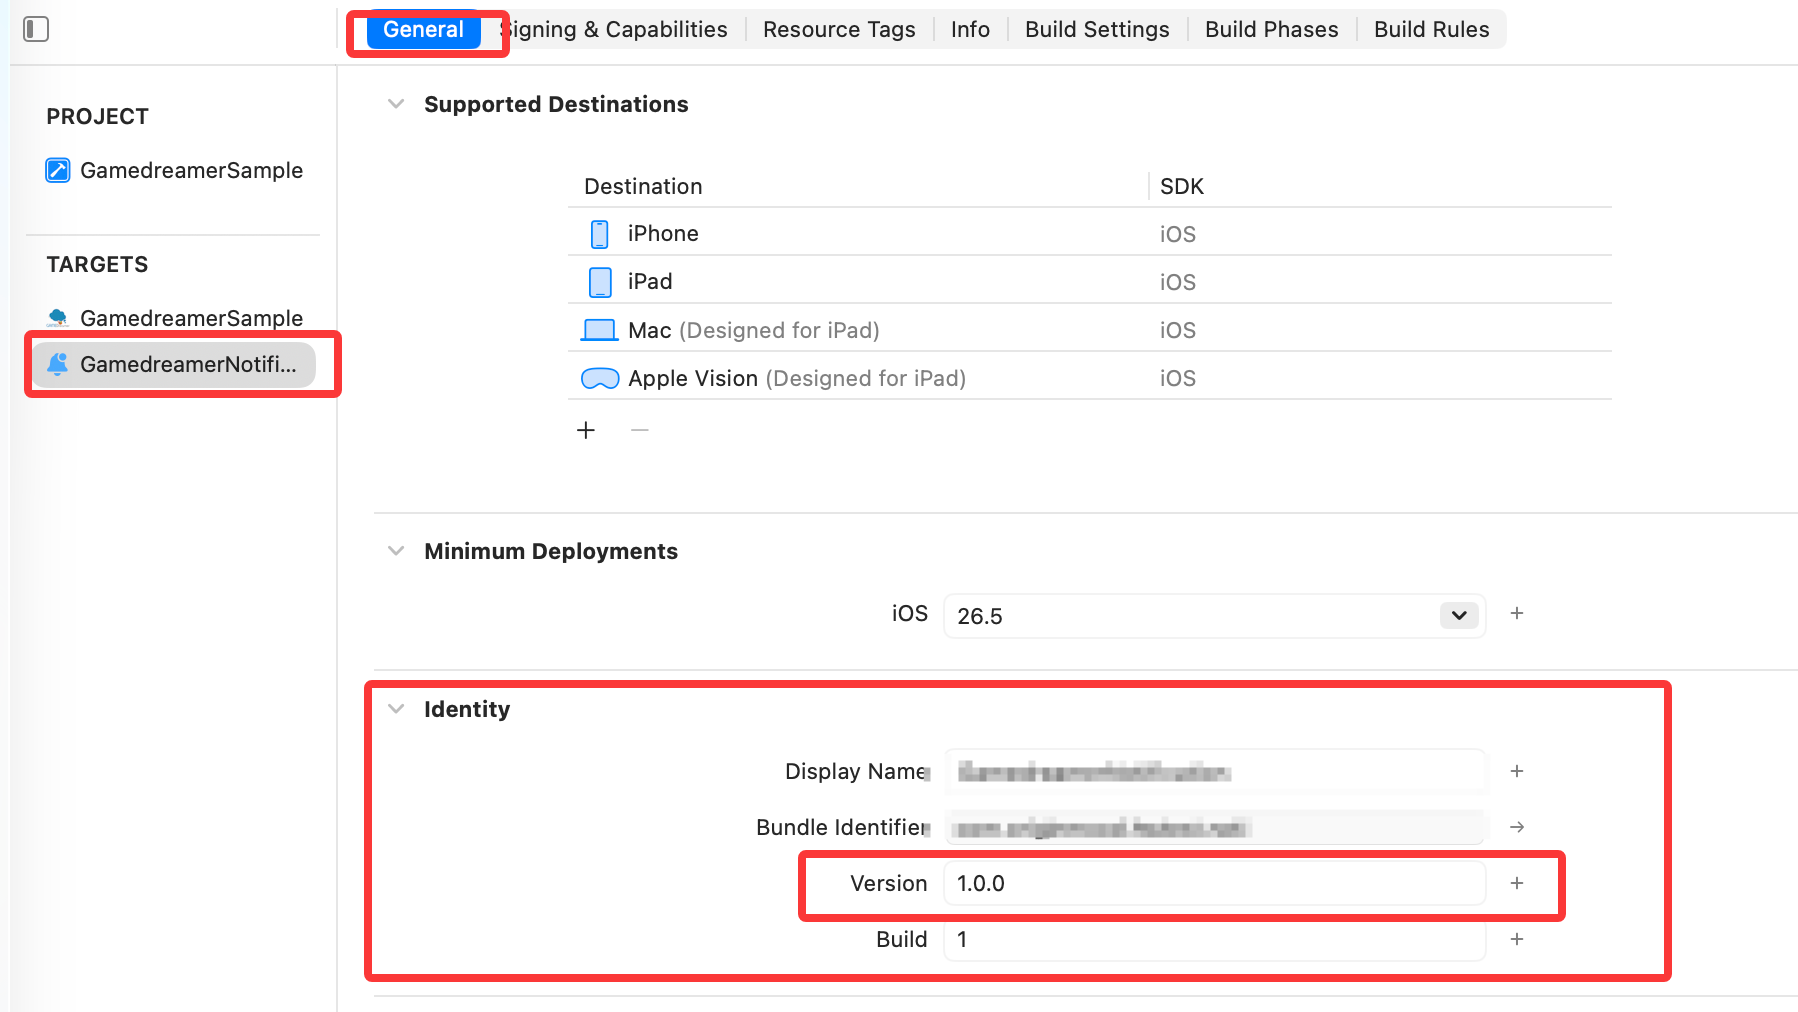
- 1. The extended Minimum Deployments cannot be higher than the main App. It is recommended that the deployment version be consistent with the main App.
- 2. The extension is consistent with the Bundle version(CFBundleVersion) of the main App and the CFBundleShortVersionString recommendation.
5. Extend and import SDK and resource files
- 1、
Project -> Targets -> NotificationServiceExtension -> General, directly drag the projectGamedreamerToFrameworks and LibrariesEnsured in the raceDo Not Embed, the effect is shown in the figure: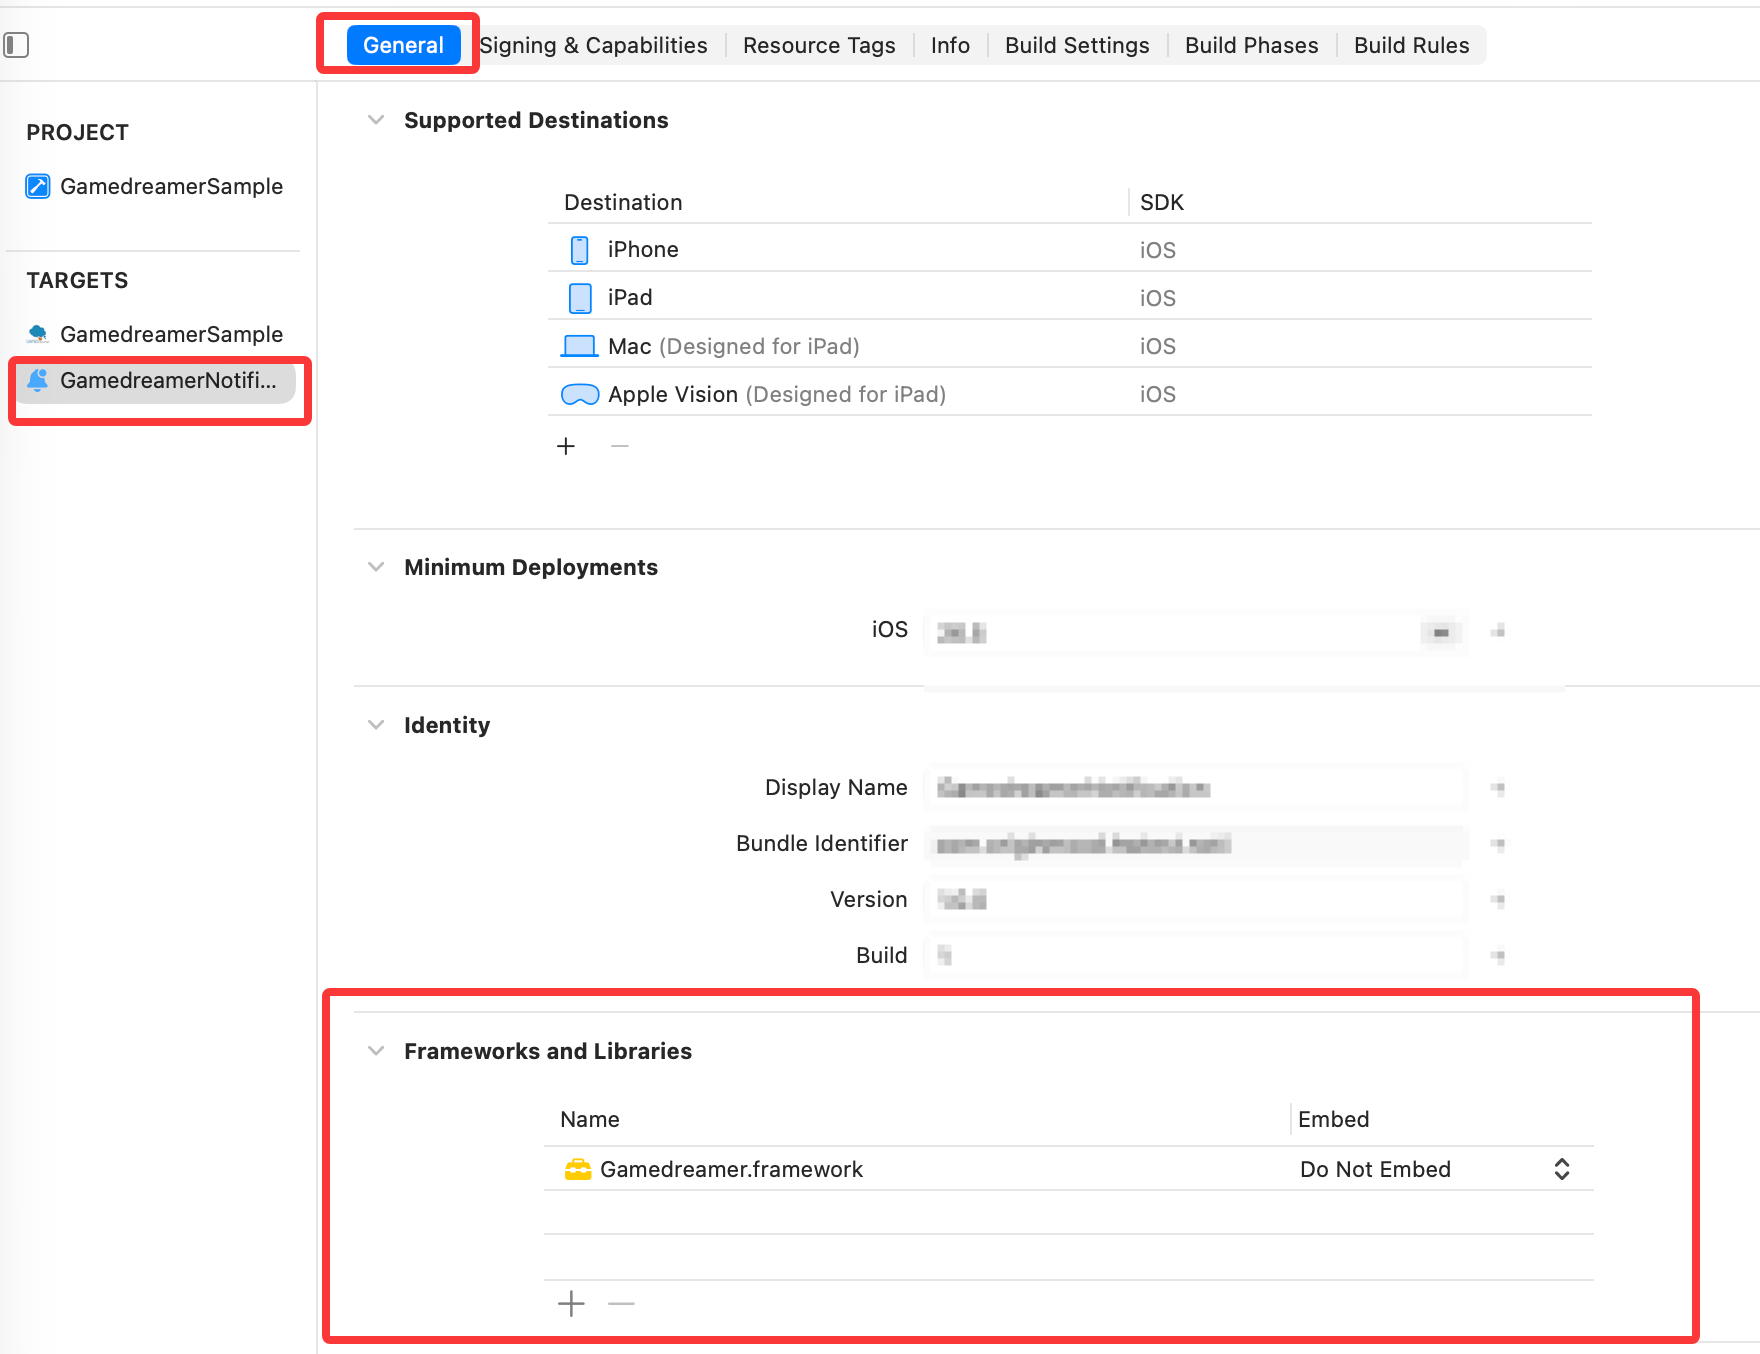
- 2、
Project -> Targets -> NotificationServiceExtension -> Build Phases, directly drag the projectGamedreamerResourcesToCopy Bundle Resources, the effect is shown in the figure: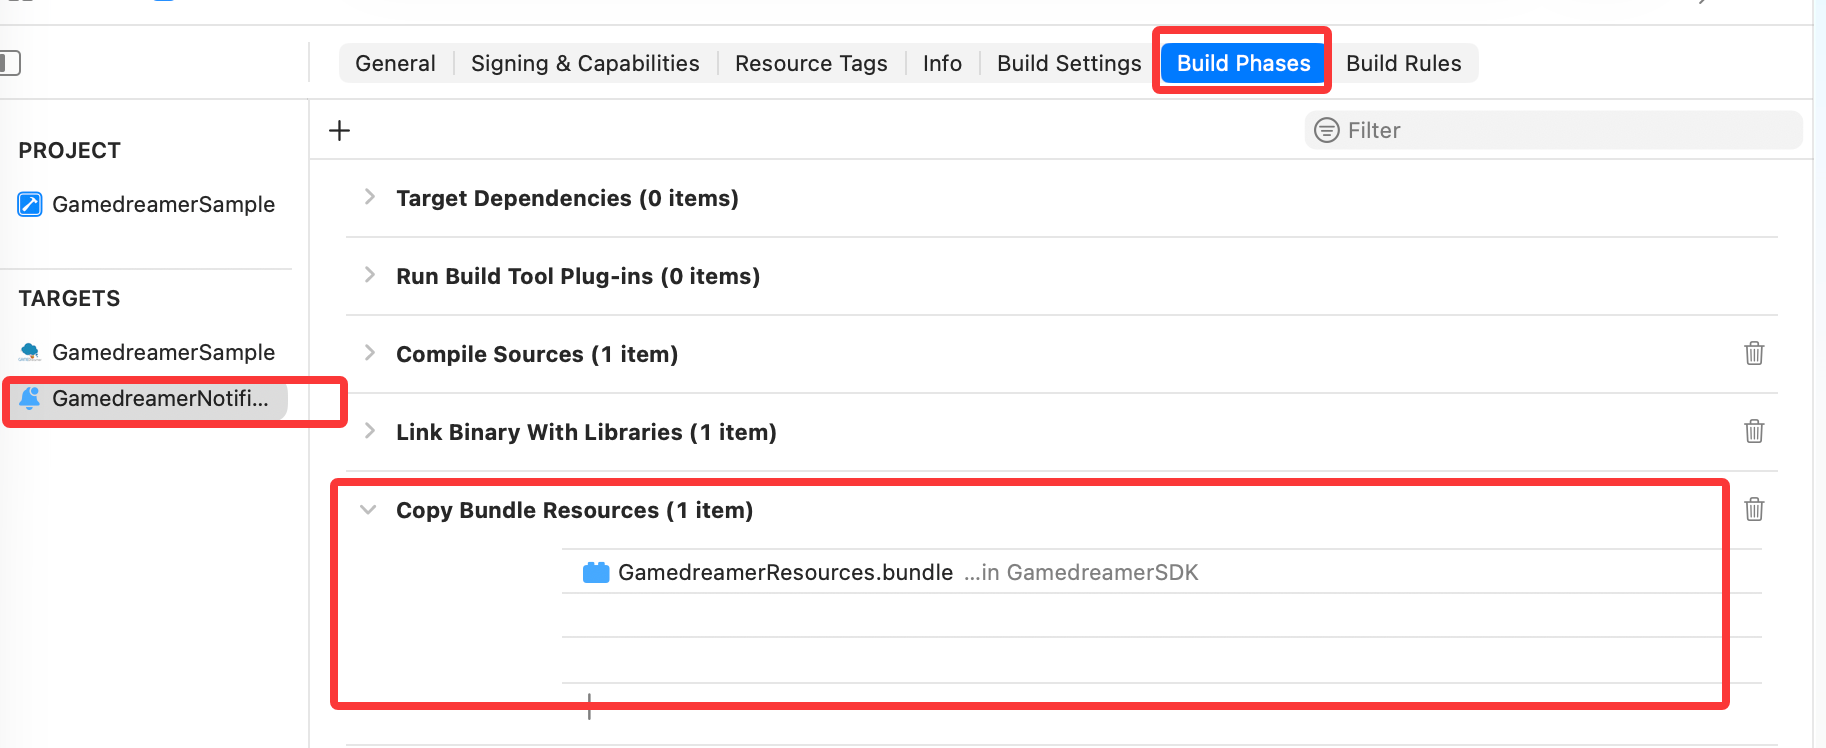
6. Refer to the notification service extension interface provided by SDK
- In
NotificationService.mAt the top of the contents of the file#import "NotificationService.h"Write below#import <Gamedreamer/Gamedreamer.h>Code, and in- (void)didReceiveNotificationRequest:(UNNotificationRequest *)request withContentHandler:(void (^)(UNNotificationContent * _Nonnull))contentHandlerMethod for medium control[[GamedreamerManager shareInstance] gamedreamerdidReceiveNotificationRequest:request withContentHandler:self.contentHandler];
Note: the newly-created file will have automatically generated preset sample code. Under the comment of // Modify the notification content here..., you need to delete and call the interface provided by the SDK, or you can directly copy the code below and completely replace the NotificationService.M Contents in file
objective-c
#import "NotificationService.h"
#import <Gamedreamer/GamedreamerManager.H> // Quote SDK

@ Interface NotificationService ()

@ Property (nonatomic, strong) void (^ contentHandler)(UNNotificationContent * contentToDeliver);
@ Property (nonatomic, strong) UNMutableNotificationContent * bestAttemptContent;

@end

@implementation NotificationService

- (void)didReceiveNotificationRequest:(UNNotificationRequest *)request withContentHandler:(void (^)(UNNotificationContent * _Nonnull))contentHandler {
    self.ContentHandler = contentHandler;
Self.bestAttemptContent = [request.content mutableCopy];
// Call the notification service extension interface.
[[GamedreamerManager shareInstance] gamedreamerdidReceiveNotificationRequest:request withContentHandler:self.contentHandler];
}

- (void)serviceExtensionTimeWillExpire {
    // Called just before the extension will be terminated by the system.
    // Use this as an opportunity to deliver your "best attempt" at modified content, otherwise the original push payload will be used.
Self. content Handler(self. bestTempt Content);
}

@ End
VII. Precautions for Packing and Exporting IPA
- 1. Use the scheme packaging of the main App, and the extension will be automatically packaged into IPA
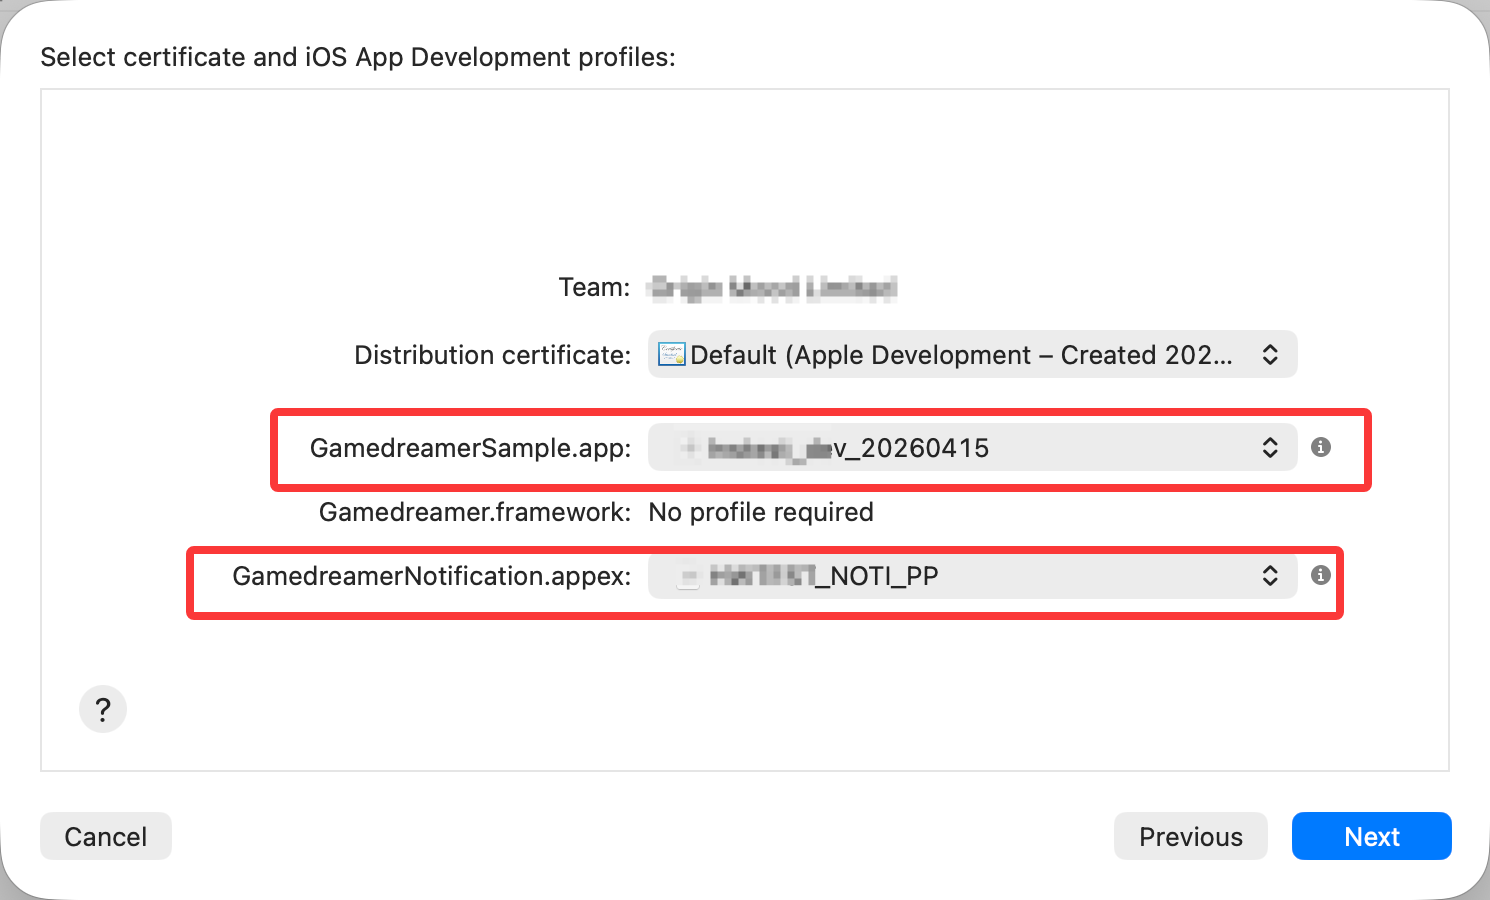
- 2. When using Xcode to export IPA, you need to add both the main App and the extended description file.